

")
W-STANDARD BATTERY INSTALL GUIDE
Do not throw away the box or any foam packaging until after installation is complete!! Please also be sure to read the included User’s Guide for cautions and information on care and charging…
You’ll need a #3 Philips screwdriver to install the W-STANDARD battery, possibly scissors, and whatever tools are needed to remove and reinstall bodywork and to access the battery box.
EXAMPLE–YAMAHA YZF-R6
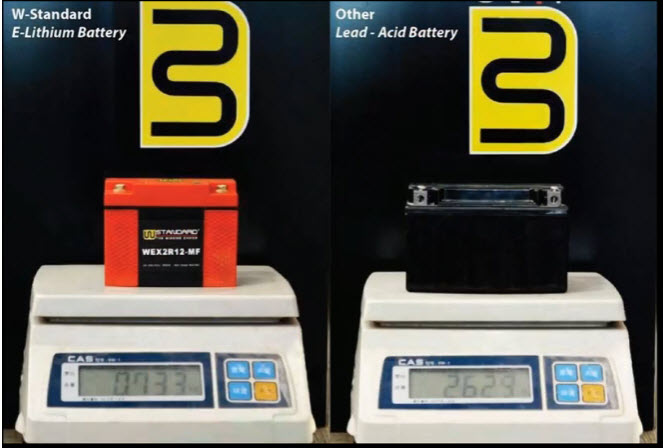
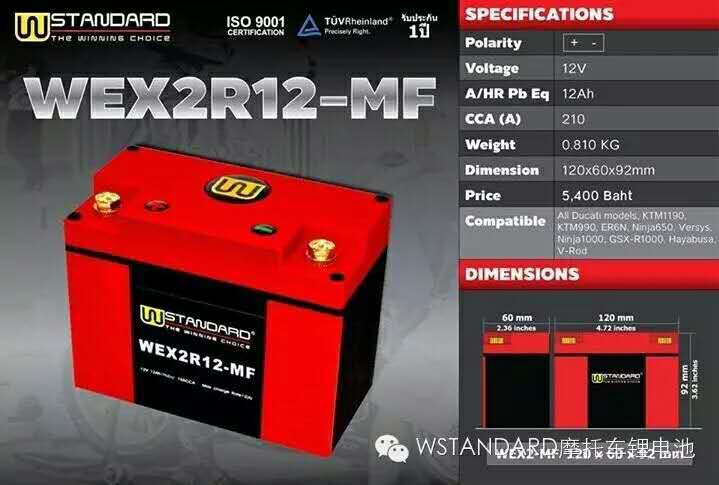
The factory-installed battery in the YAMAHA YZF-R6 is YT9B-BS lead-acid battery . Our standard recommendation for W-STANDARD is WEX2R12-MF. The WEX2R12-MF weighs 1.61 lbs less than the original (or 0.73Kg, ~73% lighter), has less than 1/4 the self-discharge rate, and turns the engine 20% faster!
LET’S GET STARTED - CHECK CONTENTS…
• W-STANDARD Starter Battery, with one set terminal screws/nuts pre-attached
• Spare set terminal screws/nuts (A3 steel, tin plated)
• Various sheets of high-density, adhesive-backed foam sheets for W-STANDARD fitment to stock battery box (if needed)
• User’s Guide
CHECK POLARITY & SIZE
First, remove the original lead-acid battery from your vehicle, according to the maker’s guidelines. BE SURE to Remove the NEGATIVE terminal bolts and cables first, then the Positive, to avoid possibility of shorting from positive to grounded vehicle parts…
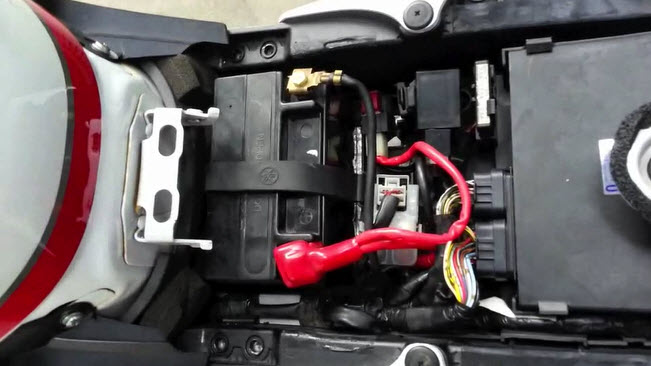
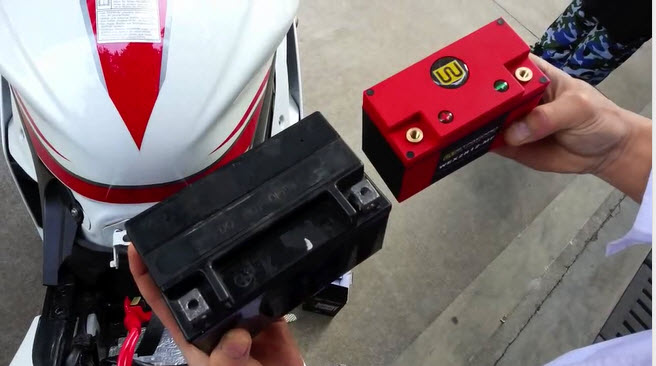
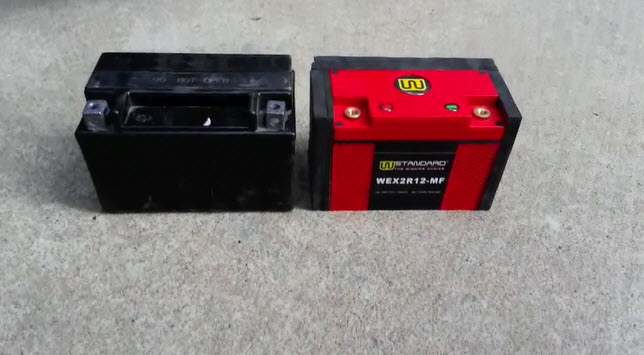
Compare the original battery side-by-side with the new W-STANDARD battery. First check that the Polarity (+/- terminals) arrangement is the same on both. If not, contact W-STANDARD directly for advice. Next check that the W-STANDARD battery does not exceed the size of the original in any dimension (length, width, height). If the W-STANDARD battery is larger in any dimension such that it cannot be made to fit into the stock battery box, please contact W-STANDARD directly.
Pictured above note that the W-STANDARD battery is identical in length to the original battery behind it, and below you can see the W-STANDARD battery is the same width as well, but a bit shorter. We’ve used one sheet each of 5mm and 10mm thick spacer foam to make up the height difference.
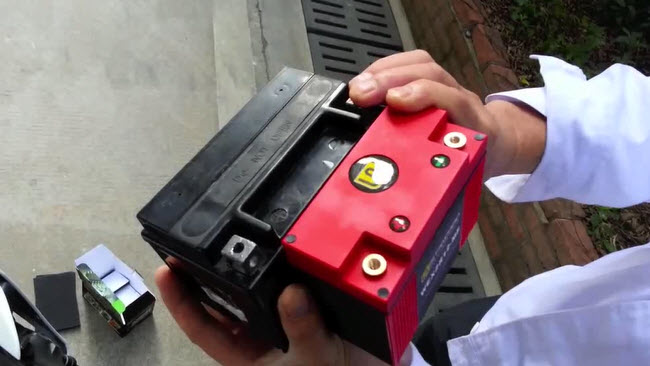
In this example, we only needed to shim the height. Do the same if the original battery is significantly larger in width or depth, and trim the selected spacers to fit with scissors.
Note! You will find the four terminal nuts (2 are spares) come with foam blocks attached on the nut bottoms. This helps keep the nuts in place during install, and up high where they can catch the bolt threads.

The W-STANDARD batteries can bolt cable eyelets to either the top or front sides of the terminals. Be sure to Install the POSITIVE terminal cable first, then Negative, to avoid short circuits.
Max torque for the terminal screws is 30kg/cm (26 inch/pound). Do not over-tighten. We recommend the use of a #3 (big!) Phillips screwdriver, as this allows you to apply downward pressure on the terminal screw. That helps the threads catch, and reduces torque on the terminals. Note that the terminals are not anchored at back, and may twist slightly during install. If so, performance is not affected.
Check that the positive terminal of the W-STANDARD battery cannot short against any part of the vehicle; and be sure that the original positive terminal cover, if any, is re-installed on the W-STANDARD battery before the battery box cover is fitted.
W-STANDARD batteries are pre-charged to approximately 90% of capacity. Therefore it is not required – nor generally recommended – that the batteries be charged before use in your vehicle. However, owners of W-STANDARD charger systems may use the CHARGE mode to fully top the battery, as the W-STANDARD charger will insure ideal cell balance and perform diagnostics to guarantee best performance.
Enjoy your W-STANDARD battery!
See http://www.ewstandard.com for full product details and much more…